The M.Edelman's Art
  • Blog

Writing A Book

10/12/2015

0 Comments

 
Picture
A rainy morning a few weeks ago my girlfriend walked down the stairs, half awake and asked, “What are you doing?” I said, “Writing a book.” She walked away somewhere between disbelief and resigned acceptance that I probably really was writing a book .

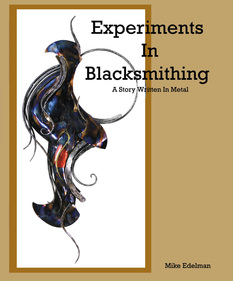
A few weeks later and I'm finally comfortable enough with it to release the .pdf version on Etsy. What is it? Why did I write it?

First, let me clarify when I say I've been working on it for a few weeks I've really been working on it for 20 years. From very early on, I've documented nearly every piece of art I ever created. All I did over the last few weeks was organize it in a meaningful way, the story was already written.

This is the third time I've tried to write this book. The first 2 or 3 pages are always easy, but somewhere between page 3 and page 20, my mind turns mushy, crippling self doubt gains control and I give up thinking, “why would I bother putting this book together, no one would ever want to read it”.

This is a book I wish existed when I first started making art. It is easy to find “best of” books and “collections” of various artists, but virtually impossible to find an artists work shown in a linear fashion as they grew. I enjoy seeing great artwork, but I'd also love to see the work that the artist learned from on their way to becoming a master.

I put together this book to show what this process looks like when written in metal. It is a story of growth, experimentation and risk. I've made a LOT of bad work in my life, and the world only see's the good stuff. It's a false presentation. For every successful piece an artist makes, there are probably 10 pieces that were complete failures.

Art is a risk taking process, and I wanted to show that process. I started making art with the belief that the work is not completed until it is documented in an image, and over the last 20 years have accumulated thousands of photographs. I distilled those down to about 200 meaningful photographs which help demonstrate growth in metalwork. Both in the aesthetic sense and maturity of subject matter.

This book is part of that tradition of experimentation and risk: this is the first edition of the first book I have ever assembled. I do not know how to write a book. I had intended to “wait until the right time” to dive in to a project like this, but waiting for the “right time” is stupid. No one is ready to take on an overwhelming task. The “right time” is yesterday, then I would be one day farther along in the process.


The .pdf version of “Experiments In Blacksmithing” is available at:
https://www.etsy.com/listing/251761108/experiments-in-blacksmithing-a-story?ref=shop_home_active_1


The print version should be coming out next month and will be available at Amazon. The proceeds from sales go to helping me continue to create metalwork and take on crazy endeavors like writing books.


0 Comments

Side Projects!

8/23/2015

0 Comments

 
Picture
Side projects are pretty common for artists across all media, but there is a prevailing misconception related in context to them. People often go, "oh, when you're not making art that is what you do", but the reality is these side projects, be it a big project or simple ritual, are just as important to the creation of art as the time in the studio making it.

Art is about thinking. Skill is mechanical and most people can figure that part out (most, definitely not all people!). To me, being an artist is creating a life where you can live in a way that facilitates having ideas come in to your head, then allows you the time, energy and money to execute those ideas. Artists lives are much broader than simply "studio time" and should be viewed as a package of activities.

That said, I love learning new things. I love setting goals and achieving them. So, when my girlfriend suggested making a pizza oven a few weeks back I said "yes"!

We live in a part of the country that is resource rich so we figured we could build an oven on a very low budget. The first thing we needed was a foundation to build the oven on. If we poured a pad then built a base with hardware store supplies, we'd have immediately been over budget. We had to get creative.

I walked across the street to my neighbors coal mine and asked nicely if I could have a rock. A really, really, really big rock! They were kind and said, "sure, go pick one out".

Me and Erin dug a pit where the rock was going to go down to about the frost line, then filled it with rocks and gravel. Meanwhile we found a BIG rock to use as the base for the oven. We set up a date to move the rock and bought lots of beer for my neighbor who was nice enough to drive it over.

He picked it up with a 5 ton capacity loader, promptly, it picked up the loader. So, we pushed it through the mine and in to my yard.
Picture
As you can tell, it was muddy and worked as a bulldozer. It was so muddy that after dropping off the rock, the skid loader got stuck in my yard. We had to get a back hoe to pull the loader out. It was exciting!

Once the rock was in place a friend helped me level the face the best we could. We tried pry bars at first, but this thing was over 5 tons and we had no shot. We finally dug a pit, shoved in a car jack, then leveled it.

The next step was pouring a flat and level surface to build the oven on. We drilled the rock and put pins in, then made a form to pour the mix in to. In the part directly under the oven, we used a vermiculite cement mixture to add insulation.


Picture
After a few days the foundation had hardened and we laid out the oven. We had picked up a pallet of hard brick from a local brick plant that recently had gone out of business. We figured out our dome, cut the bricks to fit best we could, mixed up some high heat mortar, then went at it.

For the higher up parts of the dome gravity proved troubling, so we filled it with vermiculite (sand wouldve been better, but we didnt have a bag nearby). Once it was all done we walked away for about a week to let the mortar dry.


Picture
Next we emptied out the vermiculite and breathed a sigh of relief when the dome did not collapse. We then made an arch form and went to build the chimney and door. This was one of the more complicated parts.

After the hard bricks were set, we added a layer of soft bricks on the sides and 2" of ceramic wool covered by vermiculite cement on top. Over insulating never hurts something you're going to make hot, at least that's my theory.


Picture
We then had to start weather proofing the oven. We grabbed the chicken wire, the cement and the sand and did about a 2" coat for the second to last layer. This was one of those jobs I thought would take 2 people about 2 hours. It took us over 6.

At this time the metal door was also fitted moderately tight and given an internal coating of vermiculite cement for insulation.

This coat is not the final one, but we want to let it be a few months to see where/if it cracks.

After this we waited. Then waited. We lit a few small fires to help dry stuff out, but mostly, we waited.


Picture
Then, we fired it! In about 90 minutes we got it to 800 degrees air temp with the oven floor at 400 degrees. The next morning, 12 hours later the oven was still at 200 degrees and 24 hours later the oven was still over 100.

Now that it's just about done, we will have to fill that time with pizza eating instead of oven building.

0 Comments

Vessel Form

6/30/2015

0 Comments

 
Some times a chunk of steel just wants to grow into something. I think of it as a form of inanimate self actualization. This chunk of steel wanted to be a vessel!
Picture
0 Comments

June 25th, 2015

6/25/2015

0 Comments

 
Today I made another video to show more of the process of blacksmithing, aka, metal displacement. I chose to show how I make a 1 piece garden trowel out of a 3/4" solid round bar. The metal is directionally pushed into the direction I want it to move--the trowel part is opened wide and the tang part is stretched length wise. This video is sped up to be very fast, in a few cases it looks like i'm hammering very slow--the reality is the opposite of that. Also, if I make this look easy, I've made a few hundred of these in the past ten years. I got a lot of practice!
0 Comments

Making a hook.

6/23/2015

0 Comments

 
Making a hook is often one of the first projects a new blacksmith tackles. It is one of the simplest projects you can do. A bend and a flat section with a hole or two in it. In all the years I've been forging, it is this very simplicity that has always troubled me. The hook, with so few design elements, forces you to have a perfect execution of hammer control, design and functionality. It is easy to make a hook, but one of the most difficult projects to do beautifully. 

In this video I use the 50# Little Giant hammer to rough forge a hook from 1/2" solid steel. The metal is heated to about 2200 degrees, then stretched. This video only shows the forging part of the process, the finishing part is way too boring to video, but compromises a major part of the process.
0 Comments

I think I'll Write a Book

6/22/2015

3 Comments

 
Picture
Picture
Picture
Picture
Ever just in one of those weird moods where every idea you have seems worn out and trite? A few months ago every idea I had was answered by, "that idea is stupid, why, Mike, are you wasting your time on these stupid ideas?" Every single idea I had was answered by that thought. Finally, one day I thought, "I should write a book". About what, I didn't no. I'm not a writer. I don't want to be a writer. I'm a metalworker. So it went, I decided to make a picture book, written in metal. I was stumped about the contents for a bit. By "a bit" I mean for about 2 minutes. The word "Pornography" was echoing in my head. I was going to write a pornography.

Now, let me take you back a bit. Before the idea of this book ever seeded I had a conversation with my girlfriend about porn. She asserted that the visual demonstration of sexuality to me would be broken down to motion, lines and shapes and visually observed as an emotionless interaction of aesthetic elements. When I decided to create a book of pornography I had this in mind. I was interested in the combination and interaction of forms as both a beautiful, lewd and human experience. I wish I could articulate my idea better than my words do, but i'll have to use the crutch of my actual artwork because I am better in expressing myself in metal than in English.
Picture
3 Comments

Experiments

6/22/2015

0 Comments

 
Picture
Picture
One of my favorite things to do in the winter is to experiment. I try to use the "down time" to push design and technical skills to their limits. This last winter I focused on learning how to work small pieces of brass, copper and silver in the same ways I have been working steel. I also focused on how to combine the different metals while still keeping their heat patina's intact. Shown are a few of my favorite pieces which range in size from about 12" x 3" to about 4ft x 2ft. What is NOT shown in the scrap pile I accumulated while doing these experiments. For every success there were ten failures. But, as I got better and understood the materials more, less and less pieces were trashed. The trick was learning how to minimize physical damage of mistakes (which is hard on small pieces). All in all this was one of the most educational winters I had ever done.
Picture
0 Comments

Wine Holders

6/22/2015

0 Comments

 
A few weeks ago something like this was making its rounds on facebook. I was constantly being tagged, "Mike! Make one of these!" After being tagged about a million times I thought, "okay, i'll look at this thing and consider doing something people actually want, for once". When I looked into it, the ones for sale were tiny, flimsy little things. I decided I could do better. I could make something that would: 1. Last forever. 2. Actually stay in the ground and be sturdy, and 3. Be chair height. And now, these exist. Except, it's hard to keep them in stock long because they actually sell, so you might not see one if you visit the shop.
0 Comments

Horn Handles

6/22/2015

0 Comments

 
Picture
0 Comments

June 22nd, 2015

6/22/2015

0 Comments

 
Picture
Window grille for Giuseppe's Italian Restaurant in Frostburg, MD. Photo by Mark Witt.
0 Comments

    Archives

    October 2015
    August 2015
    June 2015

    Categories

    All

    RSS Feed

Powered by Create your own unique website with customizable templates.